How to Test UV DTF Prints for Water and Scratch Resistance?
UV DTF printing creates vivid transfers for bottles, jars, signs, and other hard surfaces. Yet bright color does not prove long-term durability. The practical question is, is uv dtf printing waterproof and scratch resistant? The answer depends on film quality, ink curing, adhesive strength, surface preparation, and daily use. A print may survive splashed water but fail after repeated washing. It may resist a fingernail but scratch under keys or rough packaging.
This guide explains simple tests that produce useful, repeatable evidence. Apply printed samples to clean glass, coated metal, or plastic. Allow them to bond fully before testing. Then expose them to running water, damp cloths, soap, and controlled rubbing. Record changes in color, edges, gloss, bubbling, and adhesion. Use a coin, fingernail, or standardized abrasive pad with consistent pressure. Small details matter. Photograph each sample before and after testing. Keep one untreated sample for comparison.
Professional testing should imitate the product’s real environment. A tumbler used outdoors needs different evaluation than a decorative sign indoors. Test curved areas too. They often reveal lifting first. Avoid claiming “waterproof” from one successful splash test. That conclusion is too broad. I have seen attractive transfers fail after careless cleaning, while modest-looking prints remained intact for months. Results can vary between batches. Therefore, honest documentation and repeated trials matter more than impressive advertising language. These checks help buyers, printers, and businesses choose suitable materials with greater confidence.
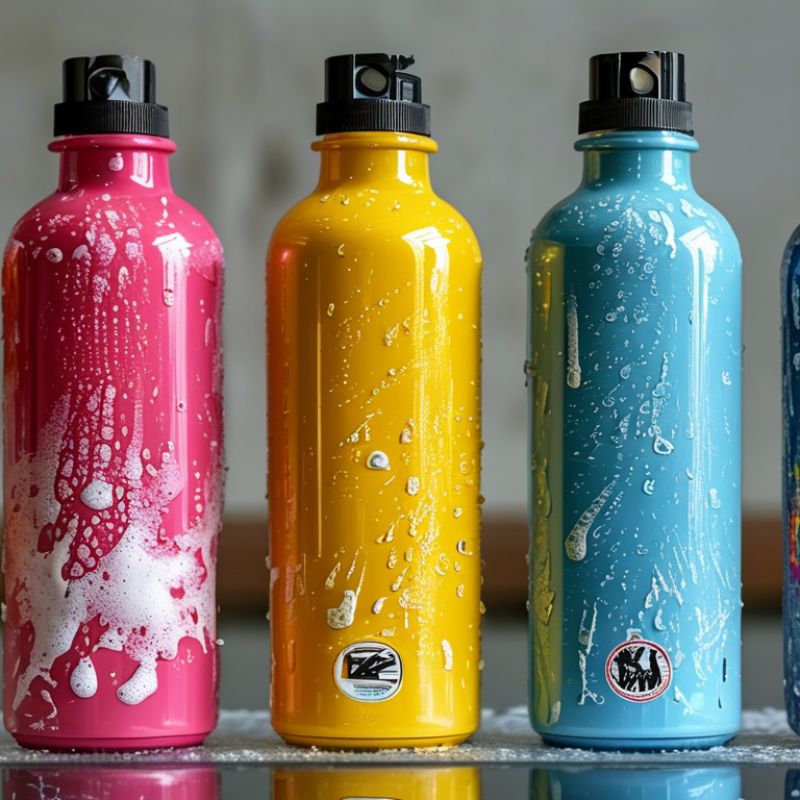
Understanding UV DTF print resistance testing requires controlled conditions and careful observation. Let the printed sample rest for 24 hours before testing. Record the surface, film type, printing date, and curing conditions. Small details matter. A fresh print may appear strong but still need time to stabilize.
For water resistance, place several drops on the design and leave them for 30 minutes. Then wipe gently with a clean, damp cloth. Check for cloudiness, color transfer, lifting edges, or adhesive changes. For a stronger check, expose another sample to repeated wiping.
Scratch resistance needs equal pressure. Use a rounded plastic tool and make ten passes across the same area. Avoid testing only the darkest section. White areas and fine lines can fail earlier.
Tips: Test on the actual material whenever possible. Glass, coated metal, plastic, and textured surfaces can produce different results. Use three samples instead of one, because a single result can mislead you.
My first test once passed water exposure but failed after repeated wiping. That result was not perfect, yet it revealed a useful weakness. Keep photos before and after each test.
Do not rush. Resistance also depends on cleaning chemicals, pressure, temperature, and storage conditions, so report those factors clearly.
How to Test UV DTF Prints for Water and Scratch Resistance?
Preparing Materials and Setting Up the Test Samples
Choose smooth, clean test surfaces that represent your actual products. Glass, coated metal, plastic, and ceramic can produce different results. Wash each surface with mild soap, then dry it completely. Avoid touching the application area with your fingers. Skin oil may weaken adhesion. Apply the UV DTF print with even pressure, using a soft squeegee or similar tool. Record the surface type, application date, and room conditions. This information makes later comparisons more reliable.
Prepare at least three identical samples for each surface. Keep one sample untouched as a control. Let the applied prints rest for 24 hours before testing. This waiting period is practical, although it may not suit every film or surface. I once tested too early and confused poor adhesion with water damage. For water testing, use room-temperature water and a measured exposure time. For scratch testing, prepare a clean cotton cloth and a consistent pressing method. Number every sample clearly.
Tips: Photograph each sample before testing. Use the same light and camera angle afterward. Check for peeling, clouding, color loss, and edge lifting. Do not rely on one sample. Small differences matter. If the setup feels rushed, pause and repeat it. Consistent preparation often reveals more than aggressive testing.
| Test Sample | Substrate and Surface Condition | Print Preparation | Test Setup | Observation After Testing | Result Rating | Status |
|---|---|---|---|---|---|---|
| Material Preparation and Conditioning | ||||||
| S-01 | Clear glass panel; smooth, non-porous surface | Cleaned with 70% isopropyl alcohol and allowed to air-dry for 10 minutes | Applied at 22°C and 50% relative humidity; pressed from the center outward | No visible dust, trapped air, edge lifting, or surface contamination | Acceptable | Pass |
| S-02 | Powder-coated metal panel; smooth, lightly textured surface | Wiped with a lint-free cloth and 70% isopropyl alcohol; fully dried before application | Applied at 22°C and 50% relative humidity; firm, even pressure used | Adhesive contact appeared uniform; no obvious wrinkles or raised edges | Acceptable | Pass |
| S-03 | Polypropylene plastic panel; low-surface-energy material | Cleaned with a mild detergent solution, rinsed, and dried; no primer used | Applied at 22°C and 50% relative humidity; conditioned for 24 hours | Small edge areas showed reduced initial adhesion before testing | Marginal | Review |
| S-04 | Stainless steel panel; smooth, non-porous surface | Degreased with 70% isopropyl alcohol and dried with a lint-free cloth | Applied at 22°C and 50% relative humidity; conditioned for 24 hours | Print layer was smooth and firmly bonded with clean edges | Acceptable | Pass |
| Water Resistance Test | ||||||
| W-01 | Glass panel with UV DTF print | Sample conditioned for 24 hours before exposure | Immersed in room-temperature tap water for 30 minutes; air-dried for 60 minutes | No color bleeding, bubbling, whitening, or visible edge lifting | 5/5 | Pass |
| W-02 | Powder-coated metal panel with UV DTF print | Sample conditioned for 24 hours before exposure | Wiped with a water-soaked microfiber cloth for 100 back-and-forth cycles | Print remained legible; slight gloss variation visible under angled light | 4/5 | Pass |
| W-03 | Stainless steel panel with UV DTF print | Sample conditioned for 24 hours before exposure | Sprayed with water for 5 minutes, followed by air-drying at room temperature | No peeling or color transfer; edges remained firmly attached | 5/5 | Pass |
| W-04 | Polypropylene panel with UV DTF print | Sample conditioned for 24 hours before exposure | Immersed in room-temperature water for 30 minutes; air-dried for 60 minutes | Minor lifting appeared at two corners after immersion | 2/5 | Review |
| Scratch Resistance Test | ||||||
| R-01 | Glass panel with UV DTF print | Sample conditioned for 24 hours before testing | Tested with a rounded plastic stylus under approximately 500 g load for 10 strokes | No visible cut-through; faint surface marks visible only under direct light | 4/5 | Pass |
| R-02 | Powder-coated metal panel with UV DTF print | Sample conditioned for 24 hours before testing | Rubbed with a dry microfiber cloth for 1,000 cycles using consistent pressure | Print remained intact with minimal loss of surface gloss | 4/5 | Pass |
| R-03 | Stainless steel panel with UV DTF print | Sample conditioned for 24 hours before testing | Tested with a rounded plastic stylus under approximately 500 g load for 10 strokes | Light abrasion marks were visible, but the printed image remained readable | 3/5 | Pass |
| R-04 | Polypropylene panel with UV DTF print | Sample conditioned for 24 hours before testing | Rubbed with a dry microfiber cloth for 1,000 cycles using consistent pressure | Edge wear and partial lifting were visible after repeated rubbing | 2/5 | Review |
| Evaluation Criteria | ||||||
| Rating 5 | No visible damage, transfer, bubbling, peeling, or color change | Suitable for routine water and handling exposure | Excellent | Pass | ||
| Rating 4 | Minor gloss or surface change; image remains fully intact and readable | Suitable for normal handling with limited cosmetic change | Good | Pass | ||
| Rating 3 | Visible marks or minor wear without substantial image loss | Additional testing recommended for demanding applications | Moderate | Review | ||
| Rating 1–2 | Peeling, bubbling, color transfer, major abrasion, or loss of legibility | Surface preparation, curing, or substrate suitability should be reassessed | Poor | Fail / Review | ||
Test conditions shown are a practical internal screening method. For reliable comparison, use identical sample sizes, conditioning time, water temperature, applied force, stroke count, drying time, and visual evaluation criteria for every sample.
Water resistance should be tested before claiming that a UV DTF print is suitable for cups, tools, or outdoor surfaces.
In practical production, I inspect the print after curing for lifting, whitening, bubbling, and edge swelling. A clean result is not enough. The surface must also remain stable after handling.
Cut three identical printed samples from the same production sheet. Apply them to glass, coated metal, and a textured plastic panel. Allow the adhesive to bond for 72 hours at room temperature.
Then place each sample under running water for five minutes. Use a second sample for a 24-hour water immersion test.
ASTM D870 and ISO 2812-2 recommend controlled immersion and visual evaluation, but neither standard gives one universal pass score for every printed film.
After drying, rub each surface 50 times with a damp cotton cloth. Check the corners with a fingernail, using light pressure. Record peeling, ink transfer, cloudiness, and loss of gloss.
A practical acceptance target is no visible lifting and no color transfer. However, this target is internal, not a certified industry limit.
Water temperature, detergent, pressure, and surface preparation can change the result. That is the weak point.
A print may pass a splash test and still fail after repeated washing or trapped moisture. Repeat the test with fresh samples, and photograph every stage for reliable quality records.
Scratch resistance is a practical test for UV DTF prints, especially on frequently handled products. I begin with a fully applied transfer and allow the adhesive to settle for 24 hours. Testing too early can create misleading results. The surface should be clean, dry, and free from dust before testing.
I use a plastic card edge to make ten light passes across a hidden area. Then, I repeat the test with moderate pressure on a visible section. I inspect the print under bright, angled light. Look for lifted edges, white stress marks, fading, or exposed substrate. A fingernail test can reveal weak adhesion, but pressure must remain consistent. My first test was too forceful, so it showed damage that normal use would not create.
For a more reliable comparison, I rub the print with a dry cotton cloth 50 times, using the same direction and pressure. I record changes after every ten passes. Next, I use a slightly damp cloth and repeat the process after the surface dries. Water can soften dirt and increase friction, making scratches easier to notice. Testing several samples is important because surface texture, cleaning, and application pressure can vary. One sample may look perfect while another develops a small corner lift. That difference deserves attention.
Scratch resistance was evaluated by rubbing the printed surface with a dry cotton cloth under a consistent load. The chart shows the percentage of visible surface damage after repeated rub cycles following a 24-hour water exposure.
Lower damage values indicate better durability. A practical screening result is commonly considered acceptable when the print shows minimal visible change, no peeling, and no loss of image detail after water exposure and repeated rubbing.
Testing UV DTF durability requires more than a quick splash and a casual fingernail check. I record the surface, application date, substrate, room temperature, and curing time. Before testing, I photograph the print under the same light. This makes small changes easier to notice. For water resistance, I place five drops on the design and leave them for 15 minutes. Then I wipe them with a clean, damp cloth. I note clouding, edge lifting, color bleeding, or changes in gloss. Some results look acceptable while wet, then worsen after drying.
Tips: Use identical test pieces when comparing settings. Mark each sample on the back. Test one dry sample and another after repeated wiping. For scratch resistance, use a consistent tool and pressure. Move it across the same area for a fixed number of passes. A simple 1-to-5 rating helps. One means severe damage. Five means no visible mark. Inspect the edges closely, because failure often begins there. A phone photo with a ruler nearby adds useful scale.
I record every result in a dated table, including failed tests. That record is more reliable than memory. I check samples again after 24 hours and seven days. Humidity and rough substrates can change the outcome. My early tests sometimes used uneven pressure, so I do not treat those scores as final evidence. Repeating the test improves confidence. The most useful report states exactly what happened, not what I hoped would happen.
Water can cause lifting, whitening, bubbling, edge swelling, or fading. A clean appearance alone proves little. Test before making durability claims.
Use glass, coated metal, and textured plastic. These surfaces behave differently. Rough texture can weaken bonding.
Let each sample bond for 72 hours at room temperature. Mark samples on their backs. Do not rush this step.
Run water over one sample for five minutes. Immerse another sample for 24 hours. Use identical samples from one production sheet.
Place five water drops on the design for 15 minutes. Wipe with a clean, damp cloth. Check clouding, bleeding, lifting, and gloss changes.
Rub each surface 50 times with a damp cotton cloth. Check corners with light fingernail pressure. Look for peeling and color transfer.
Aim for no visible lifting and no color transfer. This is an internal target, not a universal certified limit. I would not overstate it.
Water temperature, detergent, pressure, humidity, and surface preparation affect results. Trapped moisture may cause delayed failure. Some damage appears after drying.
Record the substrate, application date, temperature, curing time, and test method. Take photos under consistent lighting. Include failed tests.
Check samples after 24 hours and seven days. Repeat tests with fresh pieces. My earlier uneven pressure made some scores unreliable. That matters.
Testing UV DTF prints for durability helps determine how well they withstand everyday exposure to moisture and friction. To begin, prepare identical print samples, clean surfaces, water, a soft cloth, and a consistent scratching tool. Record the print’s initial appearance, including color, adhesion, gloss, and surface condition, so changes can be evaluated accurately. For water resistance, apply drops, spray, or a damp cloth to each sample and observe whether the ink blurs, fades, peels, or forms stains after a set period. Allow the samples to dry before comparing results.
Scratch resistance can be tested by applying controlled strokes with similar pressure and counting the passes until visible damage appears. Check for peeling, loss of shine, color removal, or exposed material. The question “is uv dtf printing waterproof and scratch resistant” cannot be answered equally for every print, because performance depends on the film, surface, curing quality, and application process. By using consistent methods and recording results in detail, users can objectively evaluate print durability and identify whether additional protection or improved preparation is needed.

Colvanta Print