Choosing equipment for garment printing starts with the work you plan to produce—not the most impressive machine in a catalog. The question “what equipment is needed for garment printing” has no single answer. A small studio making short runs may need a reliable heat press and a suitable transfer method. A shop producing detailed, repeatable designs may need a screen-printing setup, exposure unit, flash dryer, and conveyor dryer. Direct-to-garment printing brings different needs, including a compatible printer, pretreatment tools, and dependable curing. The garment, artwork, order size, and available workspace all affect the decision.
Garment-decoration consultant and educator Marshall Atkinson’s practical guidance can be paraphrased this way: “Choose equipment around the work you can produce consistently, not the work you only hope to sell.” That distinction matters. A press with uneven pressure can leave pale edges; a dryer that cannot maintain curing conditions can undermine otherwise careful work. Check operating costs, maintenance requirements, training, and ventilation before buying. Ask suppliers for demonstrations using garments like yours, and verify claims with documented specifications. Start with the bottleneck. Not the brochure. It is easy to overbuy, and I would pause before treating every upgrade as essential. A modest, well-matched setup may serve customers better than expensive equipment that sits idle. Your final choice should fit both today’s workload and a realistic plan for growth.
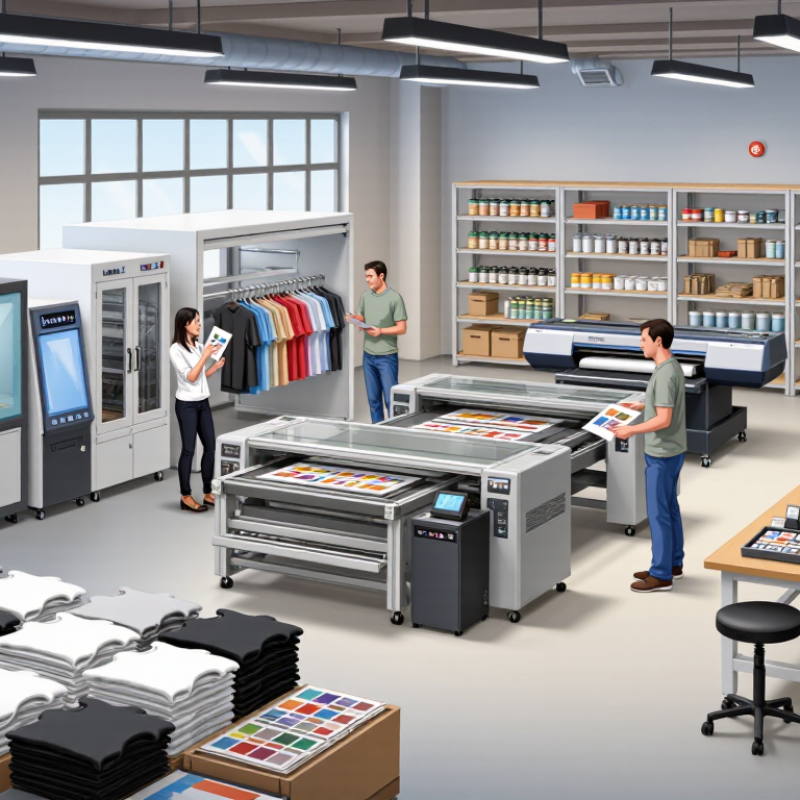
Set production targets in finished garments per shift, not machine cycles per hour. Include setup, loading, curing, quality checks, and packing. A press may run quickly, yet the finished stack can grow slowly when artwork changes or garments need rework. That matters.
Manual printing suits small runs and varied designs, but output depends heavily on operator pace and consistent registration. Automatic presses can raise volume on repeat jobs, though setup and cleaning take time. Track a real shift before estimating capacity. Plan for downtime.
DTG prints directly onto garments, making it practical for short runs and detailed, changing artwork. Pretreatment and curing add handling steps. DTF separates transfer printing from garment application, so transfers can be prepared in batches; heat-press capacity may become the bottleneck. Compare completed, acceptable pieces per hour across the whole workflow. For example, time a batch of 50 shirts from blank garment to packed order, then note where the queue forms. The estimate may be imperfect at first. Recheck it during a busy week, when staff changes and garment styles can alter the pace.
Match the ink to the fiber, not just the artwork. Sublimation dye turns to gas under heat and bonds with polyester, making it suitable for bright, durable prints on light-colored polyester garments. On cotton, the dye has little to bond with, so colors may look weak or wash away. Polyester blends can work, but the cotton content may mute the result. Test a fabric swatch first.
For cotton tees, direct-to-garment printing applies water-based ink to the fabric. Pretreatment and proper curing matter, especially on dark garments; skipped steps can cause uneven color or poor wash performance. Expect a different feel, too: heavy ink coverage may feel less soft than a small chest graphic. Small details matter.
Grand View Research’s Digital Textile Printing Market report estimated the global market at USD 2.7 billion in 2023, with a projected 12.2% compound annual growth rate from 2024 to 2030. That figure signals a growing field, not a guarantee that one process suits every job. Fabric blends, pretreatment, and press settings still vary, so a print test is worth the extra minutes. I would not rely on the garment label alone.
How to Choose the Right Equipment for Garment Printing
Choose Screen-Printing Mesh: 110–160 Mesh Suits Many Plastisol Applications
For many plastisol jobs, 110–160 mesh is a practical starting range. Lower mesh counts leave larger openings, allowing more ink to reach the garment. That can help produce bold, opaque prints on dark cotton shirts. A 156 mesh screen, for example, often handles a simple block-letter design without making ink deposit difficult to control. Higher counts in this range can retain finer details while laying down less ink. The best choice still depends on the design, fabric, and ink.
Mesh count is only part of the setup. Thread diameter and stencil thickness also affect ink flow and print detail. I would not treat 110–160 as a fixed rule: a dense graphic may need a lower count, while small text can benefit from a finer screen. Check the ink maker’s guidance, then test a sample garment. Look closely at edge sharpness, opacity, and hand feel after curing. A print can look crisp on the screen and still feel too heavy on fabric.
Tips: Start with 156 mesh for a balanced test. Keep a note of mesh count, squeegee pressure, and ink deposit. Change one variable at a time. Test first. If details fill in, try a higher mesh; if coverage looks weak, consider a lower one. A small test run can prevent wasted garments, though it may not reveal every issue in a full production run.
A mesh count of 110–160 is a common starting range for many plastisol applications.
The highlighted bar marks the 110–160 mesh range. The best choice depends on the artwork, desired detail, and ink deposit.
Many plastisol inks cure near 320°F (160°C), but that figure is not a universal setting. Check the ink’s technical data sheet, then measure the ink film itself—not only the dryer’s control-panel temperature. A probe or temperature-sensitive strip can reveal cold spots across the belt. The printed surface may feel dry while ink beneath it remains undercured.
Choose curing equipment for the garments, print area, and production pace you actually use. A conveyor dryer offers steady movement; a properly sized flash unit can help with smaller runs, but demands close operator attention. Leave enough belt length for the ink film to reach its specified cure temperature for the required time. Test heavy cotton and fleece separately. Their thickness changes heat transfer. It’s easy to overlook seams and thick collars.
Energy use matters, too. The U.S. Department of Energy’s Advanced Manufacturing Office estimates that process heating accounts for about 51% of manufacturing energy use. That broad figure is not a screen-print-shop benchmark, but it shows why excessive heat and idle running deserve attention. Keep a simple log of belt speed, measured ink temperature, and wash-test results. I’d still question any setup that relies on the display alone. Small details count. A consistent measurement routine is more useful than guessing at a hotter setting.
| Equipment Type | Best Suited For | Curing Considerations | Advantages | Limitations and Checks |
|---|---|---|---|---|
| Conveyor dryer | Regular production, multiple garments, and repeatable workflows. | Many plastisol inks have a stated cure temperature near 320°F (160°C). Set belt speed and heat so the ink film—not just the dryer display—reaches the ink manufacturer’s specified cure temperature. | Continuous operation; adjustable belt speed; suitable for consistent batch production. | Requires adequate space, ventilation, and electrical capacity. Verify ink-film temperature with a suitable probe or temperature test strips, and check that the entire printed area reaches the required temperature. |
| Flash-cure unit | Gel curing between print colors or curing small quantities and selected areas. | Exposure time and distance affect heating. A flashed ink layer is not automatically fully cured; confirm that it reaches the ink’s specified cure temperature when a complete cure is required. | Can be used between print stations and may help prevent colors from mixing during multicolor printing. | Heating can be uneven across a large design, and excessive exposure can scorch fabric or overheat the ink. Test the complete print area and garment before production. |
| Heat press | Samples, small runs, and locations where a conveyor dryer is impractical. | Use the ink maker’s specified temperature, dwell time, and pressure guidance. Confirm the ink film itself reaches the target; platen temperature alone does not confirm a complete cure. | Compact equipment with direct, controllable contact heat; useful for small-scale work. | May flatten the print texture or leave a platen mark. Pressure and heating can vary across the design, so test the garment and print before relying on the process for production. |
| Forced-air conveyor dryer | Production setups that benefit from circulating heated air as garments pass through a tunnel. | Airflow, tunnel temperature, belt speed, garment loading, and print thickness all affect how quickly the ink film heats. Validate the finished process with temperature checks on representative garments. | Combines continuous transport with circulating heat and can support consistent production when correctly configured. | Actual cure results depend on the dryer design and operating conditions. Avoid assuming that a displayed chamber temperature equals the temperature reached by the ink film. |
| Small-format curing unit | Low-volume production, sampling, or limited workspace. | Check the unit’s usable heating area and whether it can bring the entire printed ink film to the specified cure temperature, including on thicker or layered prints. | Smaller footprint and may be easier to set up for occasional work. | Limited capacity can slow production and make larger prints harder to heat evenly. Test each garment type and print size under actual operating conditions. |
Important: The 320°F (160°C) figure is a common reference point for many plastisol inks, not a universal setting. Follow the specific ink’s technical data sheet and verify the temperature reached by the ink film during production.
Choosing garment-printing equipment means checking how well a finished print withstands rubbing. A design may look sharp under shop lights, yet transfer color onto a pale sleeve after wear. ISO 105-X12:2016 provides a standardized method for assessing this colorfastness. It tests dry and wet rubbing using a rubbing cloth, helping buyers compare fabric and print combinations.
Results use a staining scale from 1 to 5: grade 1 indicates heavy color transfer, while grade 5 indicates none visible. The standard measures performance; it does not set one pass grade for every garment. Set a realistic acceptance level for the intended use, then test samples made with the actual fabric, ink, curing settings, and equipment. A small change in heat or pressure can affect results. I have seen apparently identical samples behave differently, so one test is rarely enough.
Tips: Ask for dry and wet results, the test date, and the sample’s print and curing details. Compare several samples, including dark prints on light fabric. Keep a record. Retest when materials or settings change, and inspect the rubbing cloth for visible color transfer.
Count finished, acceptable garments per shift, not machine cycles. Include setup, loading, curing, inspection, packing, and rework. Track a real shift.
Manual printing can suit small runs and varied designs, but output depends on operator pace and registration. Automatic presses may handle repeat jobs faster. Setup and cleaning still take time.
DTG handles short runs and detailed artwork, but pretreatment and curing add steps. DTF allows transfers to be prepared in batches. The heat press may become the bottleneck.
Time a batch of 50 shirts, from blank garments to packed order. Note where pieces wait. Check again during a busy week; the first estimate may be wrong.
Many plastisol inks cure near 320°F (160°C), but that is not universal. Follow the ink’s technical data sheet and measure the ink film itself.
Use a probe or temperature-sensitive strip to find cold spots across the dryer belt. A dry-feeling surface can hide undercured ink. Test heavy cotton and fleece separately.
Log belt speed, measured ink temperature, and wash-test results. Check seams and thick collars, too. The display alone is not enough.
A standardized rubbing test checks dry and wet color transfer with a rubbing cloth. Grades range from 1, showing heavy transfer, to 5, showing none visible.
Use the actual fabric, ink, curing settings, and equipment. Ask for dry and wet results, test dates, and sample details. Retest after materials or settings change.
Test several, including dark prints on light fabric. One test is rarely enough; apparently identical samples can behave differently. Keep the results.
Choosing the right equipment for garment printing begins with realistic production targets. Manual presses can suit smaller runs, while automatic systems support higher output with less repetitive labor. Direct-to-garment (DTG) and direct-to-film (DTF) equipment offer different workflows and capacities, so compare expected order sizes, artwork needs, and available workspace before investing. Understanding what equipment is needed for garment printing also means matching the print process to the fabric: sublimation is commonly used for polyester, while DTG is often suited to cotton garments.
For screen printing, a mesh count of 110–160 can work well for many plastisol applications, though the best choice depends on the design and ink. Include suitable curing equipment and follow the ink manufacturer’s instructions; many plastisol inks cure near 320°F (160°C). Finally, plan quality checks as part of production. ISO 105-X12 provides a method for measuring textile colorfastness to rubbing, helping assess whether prints retain their appearance during handling and use.

Colvanta Print