UV DTF printing is changing how businesses decorate hard objects in 2026. It transfers detailed graphics without traditional heat pressing or direct printing. That flexibility creates a practical question: what surfaces can uv dtf printing be applied to? The answer depends on surface energy, texture, cleanliness, and long-term handling. Smooth, rigid materials usually provide the most consistent results. Think of glass jars, acrylic signs, coated metal bottles, ceramic tiles, plastic cases, and finished wood panels.
Not every hard surface accepts the adhesive equally well. Slightly curved objects may work, but deep grooves and heavily textured finishes can cause lifting. Dust, oil, moisture, or silicone-based coatings can also weaken adhesion. Clean carefully. Test before production. A small sample can reveal edge lifting, bubbles, or color changes within minutes. Experienced decorators often press the film firmly with a squeegee, then inspect corners under bright light.
This guide combines workshop experience, manufacturer guidance, and surface-testing principles. It explains how to prepare different materials and choose suitable application methods. Results still vary between brands, coatings, and environmental conditions. That limitation matters. A film that performs well on one powder-coated bottle may fail on another. Temperature and storage also deserve attention. Some recommendations may require adjustment after real testing. That is not a weakness; it is part of responsible production. By comparing surfaces systematically, readers can reduce waste, improve adhesion, and create cleaner, more reliable finished products.
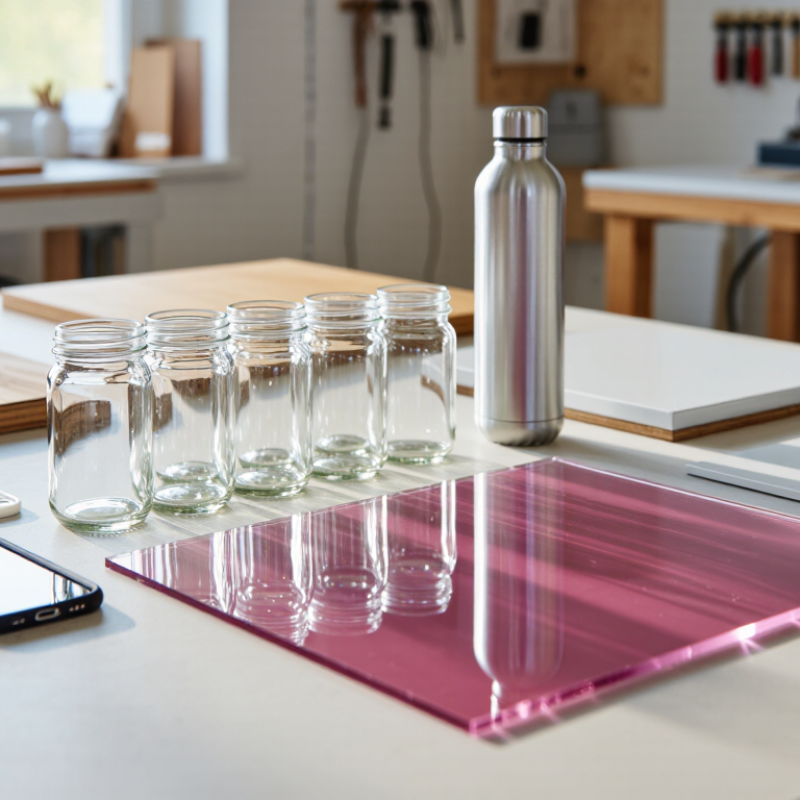
UV DTF printing combines ultraviolet curing with a transfer film system. The design is printed onto film, cured, and transferred onto a prepared surface. Unlike direct printing, it can decorate objects that do not fit easily inside a printer. But compatibility is never automatic. Surface texture, flexibility, cleanliness, and heat resistance all affect the result.
Glass, coated metal, acrylic, rigid plastic, and sealed wood often provide suitable starting points. Their smooth surfaces help the adhesive layer make consistent contact. A dusty tumbler or oily panel may show bubbles, weak edges, or early lifting. Clean with a residue-free solution, then let the surface dry completely. Press the transfer firmly, especially around corners and shallow curves. Very rough surfaces remain difficult. Deep grain can interrupt adhesion and reduce image clarity.
Flexible silicone, unfinished wood, fabric, and heavily textured rubber require extra caution. The transfer may crack when the material bends or expands. A small test patch is more reliable than a confident guess. Test before full production. Check adhesion after twenty-four hours, and rub the edge gently. Some results look perfect at application but fail during handling. Experienced operators can still misjudge a new coating. I recommend recording the surface type, cleaning method, pressure, and waiting time. These notes create useful evidence, although they cannot replace real testing.
2026 How to Apply UV DTF Printing to Different Surfaces
Preparing artwork correctly makes UV DTF application more predictable. Build files at 300 dpi, with clean edges and readable text. Use vector shapes when possible. Keep small lettering slightly thicker than usual. Fine details may disappear during transfer. Check whether your workflow requires mirrored artwork before printing. This small step is easy to overlook. Add a suitable white underbase for dark surfaces, then adjust color and varnish layers separately. Leave enough spacing between designs for accurate cutting.
Choose smooth, rigid, and non-porous surfaces such as glass, acrylic, coated metal, ceramics, or suitable plastics. Remove dust, oil, and fingerprints with a compatible cleaning solution. Let the surface dry completely. A rough or flexible object can cause wrinkles, weak adhesion, or broken details. Prepare the printer, UV curing system, laminator, cutting tools, and protective gloves. Confirm ink levels, film alignment, curing performance, and roller pressure before production. Do not trust yesterday’s settings blindly.
Tips: Test one small area first. My own early tests looked excellent on film but failed on lightly textured plastic. Press from the center outward, then peel slowly at a low angle. Inspect corners after transfer. If lifting appears, stop and review surface preparation rather than pressing harder. Keep unused film covered and dry. Record successful settings, although they may change with temperature, humidity, and material batches. Avoid applying graphics where constant flexing, abrasion, or direct food contact is expected.
Applying UV DTF Transfers to Flat and Curved Surfaces
UV DTF transfers work best when surface preparation matches the object. On flat acrylic, coated metal, glass, and rigid plastic, clean the area with isopropyl alcohol. Let it dry completely. Dust can create tiny silver gaps beneath the film. Position the transfer once, then press from the center outward with a firm squeegee. According to Grand View Research, the global digital printing market reached about USD 36.2 billion in 2023, with projected annual growth of 6.7% through 2030. This growth reflects demand for short runs and customized products, where UV DTF transfers are especially practical.
Curved surfaces require slower handling. Bottles, tumblers, and rounded containers can trap air near the edges. I leave a small test piece whenever the curve is unfamiliar. It feels inefficient, but it prevents wasted finished goods. Apply the transfer in short sections, keeping the film aligned with the surface radius. Do not stretch the design aggressively. Curves punish haste. Smithers’ 2024 digital print analysis also highlights personalization and flexible production as important market drivers. However, transfer adhesion still depends on coatings, surface texture, and handling conditions. A glossy object may look clean but resist bonding. Test adhesion after 24 hours, then rub the edge gently with a fingernail. If lifting appears, review cleaning, pressure, and material compatibility before increasing application force.
| Surface Type | Typical Examples | Surface Suitability | Preparation | Application Method | Curvature Guidance | Recommended Handling Time | Key Cautions |
|---|---|---|---|---|---|---|---|
| Glass and glazed ceramic | Glass jars, mirrors, glazed mugs, ceramic tiles | Recommended | Wash and dry completely. Wipe with isopropyl alcohol and allow the surface to air-dry. | Apply the transfer from one edge, press firmly with a squeegee or plastic card, then peel the carrier film slowly. | Best on flat areas. For cylindrical items, keep the design narrow enough to avoid overlapping edges. | Keep the decorated surface dry and free from abrasion for at least 24 hours before regular handling. | Do not apply across deep chips, grout lines, sharp edges, or areas exposed to constant soaking unless tested. |
| Acrylic and polycarbonate | Signs, display panels, clear sheets, rigid product parts | Recommended | Remove dust and protective-film residue. Use a lint-free cloth and a compatible surface cleaner. | Position carefully because the adhesive can bond quickly. Use firm, even pressure from the center outward. | Flat panels provide the most consistent results. Gentle curves are possible when the transfer is flexible and not oversized. | Allow 24 hours before cleaning or stacking decorated pieces. | Test first on recycled or coated plastics because some solvents can cause clouding or surface damage. |
| Painted metal | Powder-coated panels, coated tins, painted aluminum signs | Recommended | Confirm that the coating is fully cured. Clean with a mild detergent, rinse, dry, and degrease. | Apply at room temperature using steady pressure. Burnish the entire design before removing the carrier film. | Flat and gently curved coated metal usually works well. Avoid heavily textured powder coatings. | Wait 24 hours before frequent handling; use a longer test period for outdoor applications. | Adhesion depends on the coating. Outdoor exposure, abrasion, and chemicals require a product-specific test. |
| Uncoated metal | Stainless steel, aluminum, painted-free metal parts | Conditional | Remove oil, oxidation, and fingerprints. Lightly polish or clean the area without leaving residue. | Apply only after the surface is completely dry. Press from the center outward to reduce trapped air. | Flat surfaces are preferred. Small-diameter curves may require a narrower design and careful relief cuts in the carrier film. | Allow at least 24 hours before washing or abrasive contact. | Bare metal can have lower or less predictable adhesion than a smooth coated surface; perform a tape and wash test. |
| Hard plastic | Rigid polypropylene, ABS, PVC, storage boxes, product housings | Conditional | Remove mold-release agents, grease, dust, and plasticizer residue. Test the cleaning solution first. | Apply with controlled pressure and avoid stretching the film. Smooth outward from the center. | Flat areas and broad gentle curves are preferable. Avoid tight bends, seams, ribs, and heavily molded textures. | Wait 24–48 hours before heavy use, depending on the plastic and environmental conditions. | Low-surface-energy plastics may resist pressure-sensitive adhesives. A small adhesion test is essential. |
| Wood and sealed wood | Varnished wood, lacquered panels, finished furniture parts | Conditional | Use only on smooth, sealed, dust-free finishes. Clean gently and ensure the coating is fully dry. | Apply slowly with firm pressure, especially over fine grain or slight texture. | Flat sealed wood gives better results than curved or rough wood. Do not apply over open grain. | Keep dry for at least 24 hours and avoid immediate rubbing or polishing. | Unsealed wood is porous and may prevent uniform adhesion. Moisture movement can also cause lifting. |
| Leather and faux leather | Smooth synthetic leather, coated leather accessories | Conditional | Clean according to the material supplier’s instructions. The surface must be smooth, dry, and free of conditioner. | Use light, even pressure and avoid forcing the transfer into deep grain or stitching. | Broad, gently curved panels are more suitable than tight curves or heavily folded areas. | Allow 24–48 hours before bending, folding, or repeated contact. | Natural oils, flexing, abrasion, and deep texture can reduce durability. Test for cracking and edge lift. |
| Silicone and rubber | Silicone cases, flexible rubber parts, soft-touch coatings | Generally Not Recommended | These materials often contain additives or have low surface energy. A specialized adhesion test is required. | Use only when the transfer specification confirms compatibility. Apply without stretching the flexible substrate. | Curvature and repeated flexing significantly increase the risk of lifting, cracking, or peeling. | Follow the transfer supplier’s test procedure before production. | Standard UV DTF transfers are designed primarily for hard, smooth surfaces and may not withstand flexible use. |
| Fabric and textiles | Cotton, polyester, canvas, fleece, knitted fabric | Not Recommended | Textile fibers are porous and flexible, which prevents the smooth bonding conditions required by standard UV DTF transfers. | Use a textile-specific transfer system instead of a standard hard-surface UV DTF transfer. | Fabric movement and stretching can cause immediate or gradual failure. | Not applicable for standard UV DTF application. | Do not substitute UV DTF for heat-transfer or direct-to-textile processes. |
| Rough or porous masonry | Concrete, unsealed stone, unfinished brick, textured plaster | Not Recommended | These surfaces contain pores, dust, and uneven peaks that prevent full adhesive contact. | Use a suitable sealed coating or a substrate-specific decoration method. | Uneven geometry causes air gaps and incomplete transfer contact. | Not applicable unless the surface has been properly sealed and tested. | Do not rely on UV DTF adhesion on dusty, chalky, damp, or highly textured surfaces. |
| Flat surface application | Panels, plaques, tiles, signs, boxes, and product fronts | Most Consistent | Clean, dry, and position the design before removing the backing liner. | Align one edge, lower the transfer gradually, and press from the center outward to minimize bubbles. | No curvature-related distortion; large designs are easier to align and burnish. | Keep free from water and abrasion for at least 24 hours. | Dust, fingerprints, and surface moisture are common causes of poor adhesion. |
| Cylindrical surface | Bottles, tumblers, tubes, jars, and round containers | Use With Care | Clean the entire application zone and mark a straight reference line if alignment is important. | Start at the center or one controlled edge, wrap gradually, and press in short sections. | Use narrow designs on tight diameters. Avoid placing large rigid designs across the highest-curvature area. | Keep the item stationary and dry for at least 24 hours. | Overlapping edges, trapped air, and excessive curvature can cause wrinkles or edge lift. |
General guidance: UV DTF transfers are pressure-sensitive decorations intended mainly for clean, smooth, rigid, non-porous surfaces. Actual durability depends on surface chemistry, cleaning, curvature, handling, moisture, abrasion, and outdoor exposure. Always test the exact surface and cleaning conditions before production.
2026 How to Apply UV DTF Printing to Different Surfaces
Adapting UV DTF techniques begins with identifying the material, texture, and shape. Glass, coated metal, acrylic, ceramic, and smooth plastic usually provide reliable surfaces. I clean each item with lint-free cloths and isopropyl alcohol. Dust or oil can create tiny lifting points. Let the surface dry completely. Measure twice.
For glass jars and ceramic mugs, I align one edge before pressing the transfer slowly. A felt squeegee helps prevent trapped air and uneven pressure. Curved objects need controlled application, especially near handles and narrow edges. I avoid stretching the film, because distortion can affect fine lettering. On coated metal, a small test area confirms adhesion before production. Uncoated, powdery, or heavily textured surfaces may require another decoration method.
Acrylic and rigid plastic need careful pressure, since excessive force can mark their surface. Some plastics release oils or contain additives that weaken adhesion. I test for 24 hours before promising durability. UV DTF is not ideal for fabrics, flexible silicone, or surfaces exposed to constant abrasion. Hand washing is often safer than aggressive scrubbing. I still make mistakes. A rushed cleaning step has caused more failures than poor printing in my workshop. Record the material, cleaning method, pressure, and waiting time for repeatable results.
After applying UV DTF to glass, metal, plastic, or sealed wood, check the transfer under bright, angled light. Look for trapped air, lifted corners, uneven pressure, or tiny dust marks. Run a clean fingertip around the edges. A smooth edge usually shows proper bonding, but it does not guarantee long-term durability. Test a small hidden area before producing multiple items.
Finishing requires patience. Press the design firmly with a soft squeegee or lint-free cloth, especially across corners and textured sections. Peel the carrier film slowly at a low angle. If part of the design lifts, stop and press that area again. I have sometimes peeled too quickly and damaged a clean transfer. That mistake is easy to avoid. Leave the finished item undisturbed for the recommended curing and bonding period. Avoid stacking products immediately.
Maintenance depends on the surface and its daily use. Clean printed products with mild soap, lukewarm water, and a soft cloth. Do not scrub with abrasive pads or sharp tools. Avoid strong solvents, prolonged soaking, and high heat unless testing confirms resistance. For drinkware, hand washing is generally safer than repeated dishwasher cycles. Inspect frequently used items each week. Check the corners and narrow details first. If the surface feels rough or begins lifting, stop using harsh cleaners and record the conditions that caused the change. Surface preparation, handling, and cleaning habits often matter as much as the transfer itself.
Recommended minimum waiting time before routine cleaning after UV DTF application. Smooth, non-porous surfaces generally require less settling time, while textured, porous, or coated surfaces need additional time. Clean with a soft cloth and mild detergent; avoid abrasive pads, strong solvents, and high-pressure washing.
The design is printed onto film, cured with ultraviolet light, and transferred onto a prepared surface. It can decorate objects that do not fit inside a printer.
Smooth, rigid, and non-porous surfaces are usually suitable. Glass, acrylic, coated metal, ceramics, sealed wood, and some plastics can provide consistent adhesion.
Dust, oil, and fingerprints can cause bubbles, weak edges, or early lifting. Clean with a residue-free solution, then allow the surface to dry completely.
Results may be unreliable on silicone, fabric, unfinished wood, and heavily textured rubber. Bending can crack the transfer. Deep grain can also reduce image clarity.
Build artwork at 300 dpi with clean edges and readable text. Use vector shapes when possible. Make small lettering slightly thicker, because fine details may disappear.
A white underbase can improve visibility on dark surfaces. Adjust white, color, and varnish layers separately. Check whether your workflow requires mirrored artwork before printing.
Press from the center outward, especially around corners and shallow curves. Peel slowly at a low angle. Inspect every edge after transfer.
Yes. Apply a small test patch and check it after twenty-four hours. Gently rub the edge. A transfer can look perfect initially and still fail during handling.
Confirm film alignment, ink levels, curing performance, laminator pressure, and cutting tools. Temperature, humidity, and material batches can change successful settings.
Avoid surfaces exposed to constant flexing, heavy abrasion, or direct food contact unless suitability has been verified. I once trusted a clean-looking test too quickly.
UV DTF printing offers a flexible way to decorate a wide range of objects by transferring cured, full-color designs onto prepared surfaces. This guide explains what surfaces can uv dtf printing be applied to, including glass, metal, plastic, ceramic, wood, acrylic, leather, and other smooth or lightly textured materials. It also covers how to prepare artwork with suitable dimensions, select clean and stable materials, and organize the required tools before application. Proper surface cleaning, alignment, pressure, and peeling technique are essential for achieving sharp, durable results.
The article further explains how to adapt the application process for flat, rounded, and irregular shapes. Different materials may require adjustments in pressure, positioning, and finishing to prevent bubbles, lifting, or uneven adhesion. Finally, it outlines practical steps for inspecting completed products, correcting minor issues, protecting the printed surface, and maintaining finished items through careful cleaning and handling.

Colvanta Print